Inventory Clearance! 2024 And Older Inventory Must Go!
How To Build A Shiplap Planter

I’m at it again! I am loving making planter boxes for around our home and greenhouse. I have been wanting to make a shiplap planter ever since I saw the cost of just buying one $60+ to buy one vs $15-$20 to build one… that’s a win! This is a beginner DIY project that will be sure to make you proud when it’s completed!
Let’s get building!
Materials
- 3 1x6x8
- 1 1x3x8 or 1 1x4x8
- 3 1x2x8
- 1”- 1 1/4” inch brad nails
- Wood glue
Tools
- Miter Saw (or have the lumber yard or friend help with cuts!)
- Measuring Tape
- Nail Gun
Cuts
- 4 1×2 cut at 19 inches
- 4 1×3 or 1×4 cut at 19 inches
- 6 1×6 cut at 17 inches
- 6 1×6 cut at 18 inches
- You will make cuts for cleats and the top after the box is built
Directions
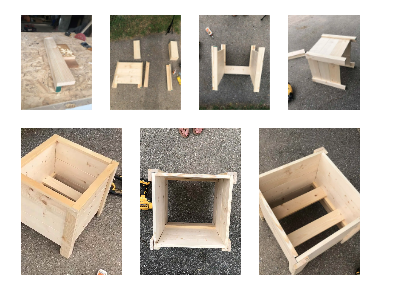
- Start by building your legs. You will use your 1×2 and 1×3 to build four legs. Place the 1×2 on its side, apply wood glue, and place the 1×3 on top. I like to use a block to help support the 1×3. Use 1 1/4 inch brad nails and nail the 1×3 to the 1×2. (See example below)
- Take your legs and place them with the 1×3 face side down. You will add your 18-inch 1×6 pieces starting with the first one flush with the top and adding the 2 below. I like to use Applewood glue on the sides, add the 1×6, and then use 1-inch nails to nail the sides. You will have two sides completed!
- Place your two sides vertical and attach your 17-inch board the same way as the 18-inch boards. I like to use 1 1/4 inch brad nails for these sides along with wood glue. Once your 3 boards are attached on the one side, flip and complete the last side!
- You have a completed planter! At this point, you can either add trim to the top with the remaining 1×2 or leave as is. If you choose the trim, just measure the top and cut the pieces to size and glue and nail with 1 1/4 inch nails.
- Measure the inside of your box and add cleats on either side with 1×2 with wood glue and nails. Add 2-3 pieces of wood on top of the cleats to hold a plant.
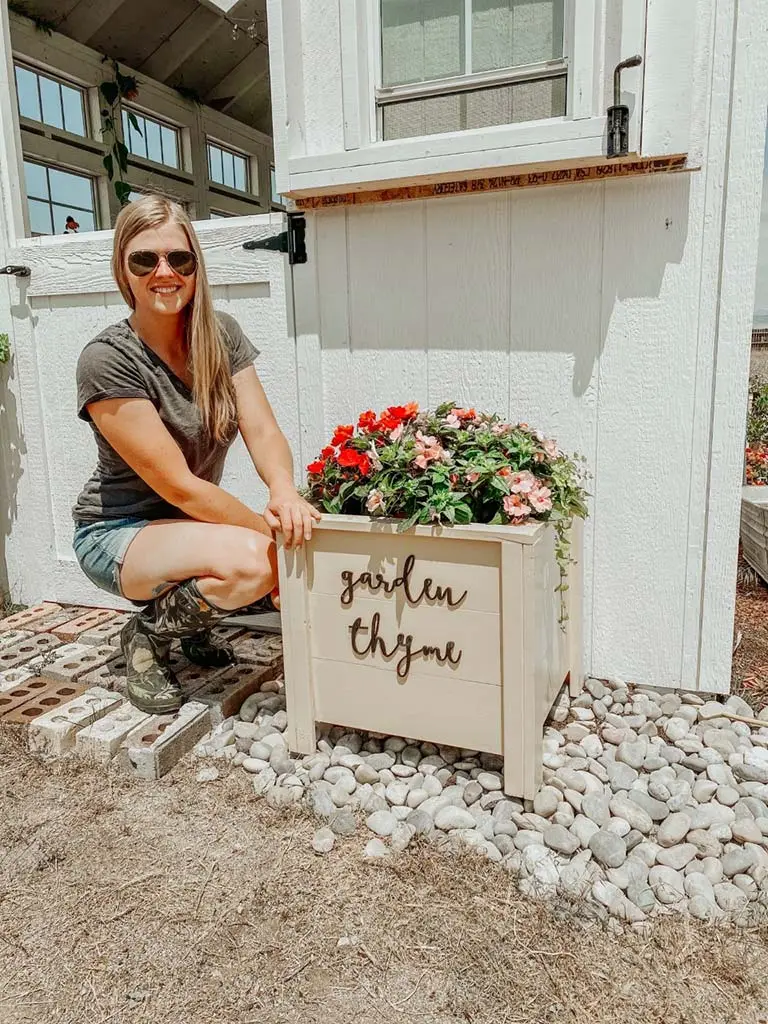
- Stain or paint your planter, add a sealer, insert a pretty plant, and BAM! You’ve made yourself a shiplap planter! If you would like to add a word I have linked the Etsy shop where I get my word cut-outs!

What Do Our Customers Say?
We do our best to provide a great experience for every shopper! But don't just take our word for it...
My chicken coop was delivered last week and I absolutely love it! It was delivered within two weeks of ordering and the workmanship is amazing!!
…
My chicken coop was delivered last week and I absolutely love it! It was delivered within two weeks of ordering and the workmanship is amazing!! The salesman in Miles City, Robert, was great in answering all of my questions and concerns. The delivery guy, Jason, was also very kind in accommodating my work schedule. Upon delivery he made sure it was placed correctly and answered any questions that I had. I am very happy with my coop and I would definitely recommend Montana Shed Center to everyone! Start to finish a great experience!!
Pam Beardsley
I was able to design the absolute coolest most high quality she-shed I could have ever dreamed up! The customer service was amazing, very very
…
I was able to design the absolute coolest most high quality she-shed I could have ever dreamed up! The customer service was amazing, very very helpful! I never thought I would ever be able to have a custom built shed, but Montana Shed Center literally made my dream affordable! Somewhere I can craft and create no matter the season! Highly recommend them and will continue to tell everyone I know:) Thanks Montana Shed Center!!>>>>>>>>>>>>>>Stacie Peterson
Hunter Peterson
After looking around and pricing other sheds we decided that the quality and workmanship of Montana Sheds surpassed anything else out there. We got a
…
After looking around and pricing other sheds we decided that the quality and workmanship of Montana Sheds surpassed anything else out there. We got a 12×16 Hi-Side barn. From my original dealings with Jim, the salesman, to Dusty, the delivery and a follow up call to ask if we were satisfied with the whole process was great . They were professional, pleasant and helpful. It was delivered within a week. The whole experience was great. We do recommend Montana Shed Center, very happy customers!
Betsy Sheridan Melin
I called Montana Shed to order a loafing shed for my horses, the gal Alexis who helped me was outstanding, they were back logged for
…
I called Montana Shed to order a loafing shed for my horses, the gal Alexis who helped me was outstanding, they were back logged for ordering but she sold me on a much larger shed they had in stock and verified with me that there was no delivery charge to Ennis. I agreed to the price and gave my cc to complete the deal
A few days later a gentleman called me to schedule delivery, I re arranged my work travel and set the date.
24 hours prior to delivery Alexis calls me while I’m on my business trip to inform me that there will be a 1,500 delivery fee and that she was sorry they made a mistake however if I would order one there would be no delivery fee
Upsetting as it was I just said no and to refund my money
Update!
Joe one of the owners just called and wants to make it right and build exactly what I want
Save!!!!!!
Christian Pederson
We purchased our shed in Shelley,Idaho the young man who helped us was very knowledgeable about all aspects of the shed— we wanted bigger doors
…
We purchased our shed in Shelley,Idaho the young man who helped us was very knowledgeable about all aspects of the shed— we wanted bigger doors and a loft and he got all the measurements and showed us the complete shed with our measurements.
I received a call from the shed Company and they told me the day we were set up for delivery!!
The young man who delivered the shed was amazing getting the semi backed up between an old car and our house, under power lines and unloaded it on our railroad ties and adjusted it and it looks great!!
We are so happy with our shed and our neighbors love it, too!! I may have talked a few into buying one!!
Thanks to all who helped us out at Montana Shed Company!!!
Linda Cardona
Linda Cardona
I purchased a custom designed Quaker animal shed for my Alpacas. The designing staff at Montana Shed were knowledgeable and TRUELY acceptable to my needs.
…
I purchased a custom designed Quaker animal shed for my Alpacas. The designing staff at Montana Shed were knowledgeable and TRUELY acceptable to my needs. When assisting me, if they could not answer my question, they would find someone in the office that could.
The shed was completed in an timely manner in a high demand situation. The delivery personnel (Justin Kropf) was proficient and very articulated to detail in his delivery. It was truly a good experience from start to finish. I love this shed and would refer and buy another from this company.
The shed was completed in an timely manner in a high demand situation. The delivery personnel (Justin Kropf) was proficient and very articulated to detail in his delivery. It was truly a good experience from start to finish. I love this shed and would refer and buy another from this company.
Dawn Allee